By Christian Safka, Data Scientist at STACC
In this tutorial we will convert images to vectors, and test the quality of our vectors with cosine similarity. The full project can be found here.

What is a feature vector?
What I am calling a ‘feature vector’ is simply a list of numbers taken from the output of a neural network layer. This vector is a dense representation of the input image, and can be used for a variety of tasks such as ranking, classification, or clustering.
It is common practice in deep learning to start with a model that has already been trained on a large dataset. In this tutorial, we will use the ResNet-18 [1] model along with its weights that were trained on the ImageNet dataset [2].
Setting up images
We will need some images to test with. Any images that should be easily separable for a human (e.g. face, cat, dog) will work fine. Place the images in a folder. You can optionally clone the full project, which has some example images included.
Coding it up
You will need to have PyTorch installed, as well as the Pillow library (pip install Pillow) for loading images.
import torch
import torch.nn as nn
import torchvision.models as models
import torchvision.transforms as transforms
from torch.autograd import Variable
from PIL import Image
Let’s start by reading in image names from command line:
pic_one = str(input("Input first image name\n"))
pic_two = str(input("Input second image name\n"))
Next we prepare the ResNet-18 model. PyTorch will download the pretrained weights when running this for the first time.
# Load the pretrained model
model = models.resnet18(pretrained=True)
# Use the model object to select the desired layer
layer = model._modules.get('avgpool')
What we have done here is created a reference to the layer we want to extract from. Deciding on which layer to extract from is a bit of a science, but something to keep in mind is that early layers in the network are usually learning high-level features such as ‘image contains fur’ or ‘image contains round object’, while lower-level features are more specific to the training data. The ‘avgpool’ layer selected here is at the end of ResNet-18, but if you plan to use images that are very different from ImageNet, you may benefit in using an ealier layer or fine-tuning the model.

We also set the model to evaluation mode in order to ensure that any Dropout layers are not active during the forward pass.
# Set model to evaluation mode
model.eval()
ResNet-18 expects images to be at least 224×224, as well as normalized with a specific mean and standard deviation. So we will first define some PyTorch transforms:
scaler = transforms.Scale[1]224, 224
normalize = transforms.Normalize(mean=[0.485, 0.456, 0.406],
std=[0.229, 0.224, 0.225])
to_tensor = transforms.ToTensor()
The last transform ‘to_tensor’ will be used to convert the PIL image to a PyTorch tensor (multidimensional array).
Now lets use all of the previous steps and build our ‘get_vector’ function. This function will take in an image path, and return a PyTorch tensor representing the features of the image:
def get_vector(image_name):
    # 1. Load the image with Pillow library
    img = Image.open(image_name)
    # 2. Create a PyTorch Variable with the transformed image
    t_img = Variable(normalize(to_tensor(scaler(img))).unsqueeze(0))
    # 3. Create a vector of zeros that will hold our feature vector
    #    The 'avgpool' layer has an output size of 512
    my_embedding = torch.zeros(512)
    # 4. Define a function that will copy the output of a layer
    def copy_data(m, i, o):
        my_embedding.copy_(o.data)
    # 5. Attach that function to our selected layer
    h = layer.register_forward_hook(copy_data)
    # 6. Run the model on our transformed image
    model(t_img)
    # 7. Detach our copy function from the layer
    h.remove()
    # 8. Return the feature vector
    return my_embedding
One additional thing you might ask is why we used .unsqueeze(0) on our image. What this does is reshape our image from (3, 224, 224) to (1, 3, 224, 224). PyTorch expects a 4-dimensional input, the first dimension being the number of samples.
The hard part is over. Lets use our function to extract feature vectors:
pic_one_vector = get_vector(pic_one)
pic_two_vector = get_vector(pic_two)
And finally, calculate the cosine similarity between the two vectors:
# Using PyTorch Cosine Similarity
cos = nn.CosineSimilarity(dim=1, eps=1e-6)
cos_sim = cos(pic_one_vector.unsqueeze(0),
              pic_two_vector.unsqueeze(0))
print('\nCosine similarity: {0}\n'.format(cos_sim))
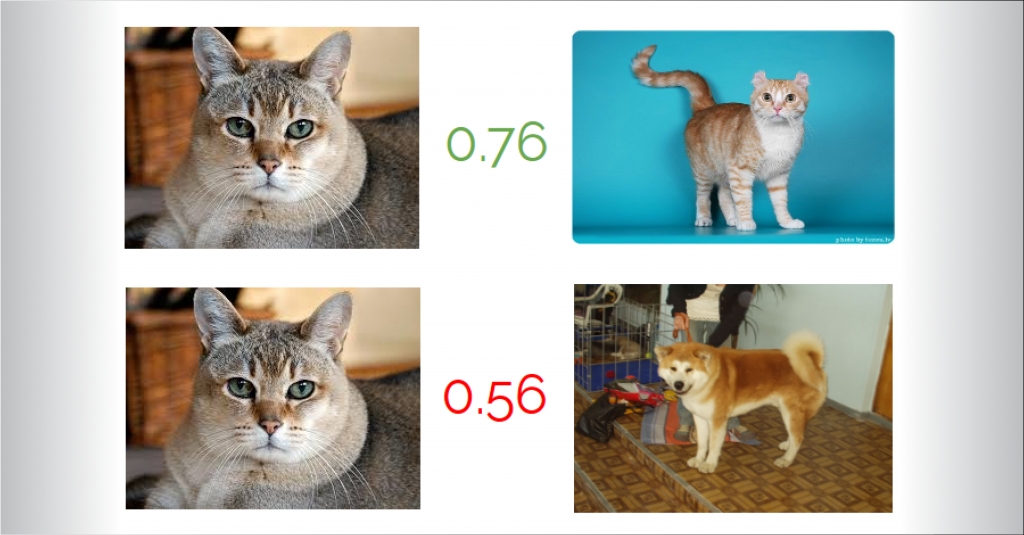
You can now run the script, input two image names, and it should print the cosine similarity between -1 and 1.
Input first image name
cat.jpg
Input second image name
dog.jpg
Cosine similarity:
 0.5638
[torch.FloatTensor of size 1]
Further work
This tutorial is based on an open-source project called Img2Vec. The full project includes a simple to use library interface, GPU support, and some examples of how you can use these feature vectors.
Contributors are welcome!
References
[1]: ResNet paper, PyTorch source
[2]: ImageNet
[3]: Original image from MathWorks
Viited
| ↑1 | 224, 224 |
|---|


